Android Wheel Widget

This is a simple widget I created as part of the Aviary Editor SDK for Android. It creates a wheel-like widet which can be scrolled in both directions.
The idea was to replace the default slider widget and use a more “real world” component.
Moreover if you’ll add the VIBRATE permission into your AndroidManifest.xml file you’ll have also haptics feedback while the wheel is scrolling:
[cce]<uses-permission android:name=”android.permission.VIBRATE” />[/cce]

To include the wheel widget in the current layout, you should add in the layout xml this lines:

<it.sephiroth.android.wheel.view.Wheel
android:id=”@+id/wheel”
xmlns:sephiroth=”http://schemas.android.com/apk/res/it.sephiroth.android.wheel”
android:layout_width=”match_parent”
android:layout_height=”match_parent”
sephiroth:numRotations=”6″
sephiroth:ticks=”28″ />

Where numRotations is the max number of rotations the wheel can perform and ticks is the total number of ticks the wheel will display.

Then in your activity you can add a OnScrollListener listener to the wheel widget, in this way:

mWheel = (Wheel) findViewById( R.id.wheel );
mWheel.setOnScrollListener( new OnScrollListener() {

@Override
public void onScrollStarted( Wheel view, float value, int roundValue ) {
}

@Override
public void onScrollFinished( Wheel view, float value, int roundValue ) {
}

@Override
public void onScroll( Wheel view, float value, int roundValue ) {
}
} );

You can download the source at the gihub project page.

Android Workspace Widget


I was looking for an android widget similar to the launcher workspace widget ( the one used in almost all launchers ), but a bit more customizable and with the possibility to use an Adapter as content provider. So at the end I mixed portion of code from the android launcher Workspace widget, the Gallery widget and the AbsListView widget.

Nothing particular tricky, just a combination of the 3 widgets in order to have the same sliding effect of the workspace ( using custom number of columns and rows ), but at the same time with an ArrayAdapter for creating views, and a little glow effect at start at the end of scrolling for creating the gingerbread style overscroll effect.

This is the source code: workspace

It’s just a first version, so it’s not really optimized…

The adapter used for creating this example looks like this:
[cc]
class WorkspaceAdapter extends ArrayAdapter {

int screenId;
PackageManager pm;
private LayoutInflater mInflater;
private int nCellsPerScreen = 4;

public WorkspaceAdapter( Context context, int textViewResourceId, List objects ) {
super( context, textViewResourceId, objects );
screenId = textViewResourceId;
pm = context.getPackageManager();
nCellsPerScreen = context.getResources().getInteger( R.integer.config_portraitCells ) * context.getResources().getInteger( R.integer.config_portraitRows );
mInflater = (LayoutInflater) context.getSystemService( LAYOUT_INFLATER_SERVICE );
}

@Override
public int getCount() {
return (int) Math.ceil( (double) super.getCount() / nCellsPerScreen );
}

public int getRealCount() {
return super.getCount();
}

@Override
public View getView( int position, View convertView, ViewGroup parent ) {

if ( convertView == null ) {
convertView = mInflater.inflate( screenId, mWorkspace, false );
((CellLayout)convertView).setNumCols( nCellsPerScreen );
}

CellLayout cell = (CellLayout) convertView;

int index = position * nCellsPerScreen;
int realCount = getRealCount();

for ( int i = 0; i < nCellsPerScreen; i++ ) { CellInfo cellInfo = cell.findVacantCell( 1, 1 ); TextView text; if ( cellInfo == null ) { text = (TextView) cell.getChildAt( i ); } else { text = (TextView) mInflater.inflate( R.layout.application_boxed, cell, false ); CellLayout.LayoutParams lp = new CellLayout.LayoutParams( cellInfo.cellX, cellInfo.cellY, cellInfo.spanH, cellInfo.spanV ); cell.addView( text, i, lp ); } if ( index + i < realCount ) { ApplicationInfo appInfo = getItem( index + i ); CharSequence label = appInfo.loadLabel( pm ); Drawable bm = appInfo.loadIcon( pm ); text.setCompoundDrawablesWithIntrinsicBounds( null, bm, null, null ); // new text.setText( label ); text.setClickable( true ); text.setFocusable( true ); text.setVisibility( View.VISIBLE ); } else { text.setVisibility( View.INVISIBLE ); } } return convertView; } } [/cc]  

Compile skia for android on Mac Lion

Some time ago I started to look at skia as possible solution for graphics 2D editing for a native android project I was developing.
Well, even if skia is part of the android system and it’s used everywhere by android itself, trying to include skia in my project was quite an hell..
Looking for resources I just found old examples and tips, and every try was just a failure.. but since android uses skia internally to do graphics operations I decided to look into the android project.

After downloading the skia module from the android git repository I just realized it couldn’t be compiled by itself because it has external dependencies. So next step was to download and compile the whole android source code. Easy task? not at all, at least if you’re on a mac running Lion!

At the end I managed to compile everything and build the skia module as static module, in this way now my project can link the skia library and include correctly the skia headers.

Ok, I don’t have the whole procedure step by step here, first of all because it depends on the android version you’re going to compiled, second and most important because I didn’t write down all the steps 🙂 So this is more a sort of list of notes about compiling android on Lion and a reminder for myself too. ( I was trying to compile android 2.2 using “generic-user” as lunch configuration )

Build Android: http://source.android.com/source/initializing.html

To get rid of clearsilver errors: http://code.google.com/p/android/issues/detail?id=993#c27

Java 1.5 version complaining: http://wiki.oneswarm.org/index.php/OS_X_10.6_Snow_Leopard

Well, the first time you’ll try to “make” everything probably you’ll get this error:

[cc]
./external/elfutils/config-compat-darwin.h:42: error: static declaration of ‘strnlen’ follows non-static declaration
[/cc]

modify ./external/elfutils/config-compat-darwin.h.
replace:
[cc lang=”c”]
static inline size_t strnlen (const char *__string, size_t __maxlen)
{
int len = 0;
while (__maxlen– && *__string++)
len++;
return len;
}
[/cc]

with:
[cc lang=”c”]
#if 0
static inline size_t strnlen (const char *__string, size_t __maxlen)
{
int len = 0;
while (__maxlen– && *__string++)
len++;
return len;
}
#endif
[/cc]

Well, at the end of the process I just edited the Android.mk makefile into external/skia adding a new entry for BUILD_STATIC_LIBRARY and the next command was simply:

[cc]mmm external/skia[/cc]

which produced the required libskia.a file to be linked in my project.

QuickActionView in Android

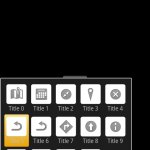
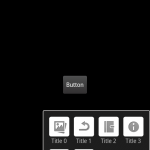
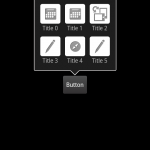
While I was searching for an custom implementation of the QuickContactBadge for Android, I went into this interesting post ( Lorenz’s Blog ), which had a custom widget called QuickAction.
While it’s a very nice widget, it didn’t fit my needs because I had the necessity of create different action layouts ( horizontal, vertical, grid.. ), so I made a very quick modification to the above code and I ended with this implementation.
Basically I removed from the original Class the ActionItem list and set a BaseAdapter as content source. In this way it’s more simple and easy to add more and different views to the widget.
Moreover I added the support for columns ( both fixed and automatic ).
Here you can see a snippet code of the QuickActionView creation:

[cc lang=”java”]
public void onButtonClick( View v ) {

// create the quick action view, passing the view anchor
QuickActionView qa = QuickActionView.Builder( v );

// set the adapter
qa.setAdapter( new CustomAdapter( this ) );

// set the number of columns ( setting -1 for auto )
qa.setNumColumns( (int) (2 + (Math.random() * 10)) );
qa.setOnClickListener( new DialogInterface.OnClickListener() {

@Override
public void onClick( DialogInterface dialog, int which ) {
dialog.dismiss();
Toast.makeText( getBaseContext(), “Selected item: ” + which, Toast.LENGTH_SHORT ).show();
}
} );

// finally show the view
qa.show();
}
[/cc]

Here some Screenshots:

And here you can find the source code: source code

ImageView Zoom and Scroll

Update: the source code has moved to github, so it’s easier for anyone to fork it!

As long as Android doesn’t have a built-in ImageView widget with zoom and scroll capabilities I tries to create one by myself starting from the google repository.

The result is pretty nice so I’m posting here the source code, if anyone is interested, or simply doesn’t want to waste the time creating a new one.

Here’s a sample code on how to use it in an Activity:


Anyway, if you want to download the source, here is the eclipse source project:
http://blog.sephiroth.it/wp-…/ImageZoom.zip
https://github.com/sephiroth74/ImageViewZoom

package it.sephiroth.android.demo;
import it.sephiroth.android.library.imagezoom.ImageViewTouch;
import java.io.IOException;
import android.app.Activity;
import android.database.Cursor;
import android.graphics.Bitmap;
import android.net.Uri;
import android.os.Bundle;
import android.provider.MediaStore.Images;
import android.view.Window;
import android.view.WindowManager;
import android.widget.Toast;
public class ImageZoomActivity extends Activity {
	private ImageViewTouch mImageView;
	@Override
	protected void onCreate( Bundle savedInstanceState )
	{
		super.onCreate( savedInstanceState );
		requestWindowFeature( Window.FEATURE_NO_TITLE );
		setContentView( R.layout.main );
		getWindow().addFlags( WindowManager.LayoutParams.FLAG_FULLSCREEN );
		selectRandomImage();
	}
	@Override
	public void onContentChanged()
	{
		super.onContentChanged();
		mImageView = (ImageViewTouch)findViewById( R.id.imageView1 );
	}
	/**
	 * pick a random image from your library
	 * and display it
	 */
	public void selectRandomImage()
	{
		Cursor c = getContentResolver().query( Images.Media.EXTERNAL_CONTENT_URI, null, null, null, null );
		if ( c != null ) {
			int count = c.getCount();
			int position = (int)( Math.random() * count );
			if ( c.moveToPosition( position ) ) {
				long id = c.getLong( c.getColumnIndex( Images.Media._ID ) );
				int orientation = c.getInt( c.getColumnIndex( Images.Media.ORIENTATION ) );
				Uri imageUri = Uri.parse( Images.Media.EXTERNAL_CONTENT_URI + "/" + id );
				Bitmap bitmap;
				try {
					bitmap = ImageLoader.loadFromUri( this, imageUri.toString(), 1024, 1024 );
					mImageView.setImageBitmapReset( bitmap, orientation, true );
				} catch ( IOException e ) {
					Toast.makeText( this, e.toString(), Toast.LENGTH_LONG ).show();
				}
			}
			c.close();
			c = null;
			return;
		}
	}
}

Widget: SlidingDrawer top to bottom

My android experiments continue…
In the last project I had to implement a SlidingDrawer which comes from top and left. The problem was that the default widget does not support all the directions, but only bottom to top and right to left.

That’s why I grabbed the SlidingDrawer source code and modified it in order to allow any direction ( defined as styleable in attrs.xml ). The only problem using custom styleable xml is that if you want to use this widget as library you need to include in the main project also the attrs.xml file as well.. a bit frustrating.

Anyway this is just the sample xml how to include the widget:


Btw If you’re interest, here you can find the full source code of the widget including a running application:

SlidingDrawer Demo 

* Updated the code thanks to Maciej Ciemięga.

Android experiments

As you probably understood during last days I’m completely absorbed in Android development.
While experimenting new things ( it remembers to me the first days with Flash 🙂 ) I did a couple of applications and I’ve published them to the market ( it takes less than one hour to be published on the market, just some weeks less than on the app store ).

First one is a simple note application, very similar to the iPhone note app. This one was for testing the ContentProvider and the built-in android search feature.
Second one is for view, search, plan routes for the Milan subway. This is a mix of features: google maps api, layar intergration, gps locations..

How-to debug native code with Android

This is a step by step guide for executing and debugging native code on Android with Eclipse.

1. Prerequisites

The SDK version used for this guide is Froyo with the NDK r4b ( crystax release ).
Also Eclipse CDT plugin it’s very useful for our purposes, so install it.
Last plugin to install it’s the Sequoyah plugin for Eclipse.

2. Project setup

At this point let’s create a new Android project, name it “Example” and use the “com.darkwavegames.com” package name, add also an Activity name of your choice.
Select Android 2.2 as base SDK version and complete the project wizard.

Now you need to add the native support for the newly created project. Just right click on the project root element in the package explorer and select “add native support”.

In the next dialog write the path of your NDK folder and give also name for your library.
After this operation a new folder “jni” will be created with a .cpp file, header filer and an Android makefile, Android.mk, which can be edited to modify all the includes, linker and compiler options. In the Android.mk file you also need to specify all the source file you want to use within the LOCAL_SRC_FILE directive.

3. Debug

In order to enable debug of native code in Android you have to face different problems, based also on the device and the firmware version, and if the native code is multi thread or single thread.
First of all you need to mofify the AndroidManifest.xml file adding the attribute “debuggable” to true ( remember also to enable the “Debug USB” option under the Application device menu ).
At this point you can debug all the java code within your eclipse debugger, for for the native C debug you need more steps.

Continue reading