Recently I decided to write my old flash tracer firefox extension from scratch because I found it not really useful (at least for me) and too “expensive”, moreover when using firebug at the same time.


Recently I decided to write my old flash tracer firefox extension from scratch because I found it not really useful (at least for me) and too “expensive”, moreover when using firebug at the same time.

 With the upcoming release of Firefox 3 I thought I had to verify my extensions to see if they work with the new Firefox version too.
For the first version of flash switcher I did two different extensions for Windows and Mac. That was a problem for maintenance.
This time I wrote the extension from scratch and I decided to make it as much as cross platform as possible. Moreover I wanted to make the installation of new plugins easier than in the previous version of flash switcher extension ( where you had to copy manually the plugin file into the extension’s directory.. ).
Thus now this extension works ( at least with my tests and people who tested it ) with Windows, OSX and Linux. Specifically it has been tested on:
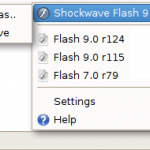
Also the installation of new plugins now it’s easy. Just click on the installed flash plugin and click “save”. Well, I think it’s quite easy 🙂
The only issue with the new extension is that it’s quite big because it comes with 2 flash versions for every OS platform. So it’s about 14Mb.
I also did a couple of video to show how it currently works on different platforms. Currently there are 2 videos (ubuntu and osx usage).
|
|
|
In order to use this extension ( if you want to try it ) you need Firefox 3.
P.S. If you want to add more flash players to the extension, download and install the version you want from the flash player archive page.
Once a new flashplayer has been installed onto your system you can save it into your flash switcher archive using the “save as” menu item of the flash switcher.
Thanks to Chad Upton who sent me some suggestions on how to improve FlashTracer I recently updated this extension adding some new features beside those already installed.
Now it is possible to define rules ( using the options panel ), which allow you to style the output messages (defining font-weight, font-style, color and text underline); they can work also like a filter to discard all the messages which don’t match the rules.
Here a screenshot of the new rules panel:
I also took advantage of this update to write the extension from scratch. It was my first extension and so the code wasn’t so clear, moreover I learnt how to use xul commands and observers.
I tested this extension on Vista, Ubuntu 7.10 and OSX 10.4. Here some screenshots of the running extension on those different OS:
Note. In some case you should first remove the mm.cfg file first. In Windows and linux it is placed into the user folder, in OSX you can find it under “/Library/Application Support/Macromedia”
Install now
P.S. Remember that you need the flash player debug.
UPDATE: A new flash tracer called fbtracer has been released. This new extension is integrated into Firebug. Read more here
Finally I’ve managed to install python on my Windows Vista!
Every time I tried to install the .msi package it was stopping work just after selecting the destination folder and I was going crazy to find a solution..
Then I managed to install it correctly using msiexec
msiexec /i python-2.4.3.msi TARGETDIR="C:\Program Files\Python24" ALLUSERS=1 /qb
 I was playing around the Windows Vista public beta 2 and I spent some time reading about the new gadgets.
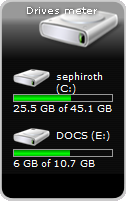
At the end I did a first test creating a very simple gadget for measuring computer drives free space.
Give it a list of drives you want to take under control and it will display them into the gadget’s window.
– Download the file
– Double click on it
P.S. It requires Windows Vista beta 2 🙂
[attachments docid=796 force_saveas=”1″ logged_users=”0″]
I noticed today that Microsoft published public beta 2 of Windows Vista
I agree with the contract, select the download method (wow, 3.5 Gb!!), and select the location…
… and I got this error:
We are currently experiencing a high level of demand and cannot process your request at this time.
Has been someone able to get the beta?
I’m really interested in the new Windows 🙂
P.S. I saw also that Office 2007 beta is available for mere mortals 🙂
Windows Vista public beta 2
Office 2007 preview
“Welcome to the Macromedia Flash Media Server 2 Public Beta. This public beta is a pre-release version of the next major release of the Flash Communication Server. It is made available on a limited basis* for developers to familiarize themselves with the new features and functionality of the product as well as to enable them to test their applications and ensure they function correctly.
This release is available for Windows Server 2000 and Windows Server 2003. The Linux version of Flash Media Server will be available when the product is released. See the System Requirements on the “Download & Feedback” tab below. Please let us know as soon as possible if you encounter any issues.”
With these words Macromedia announced Flash Media Server 2 public beta. You can download it from http://www.macromedia.com/software/flashmediaserver/public_beta and try new features!
http://www.macromedia.com/
As promised, after come back from my holiday in Warsaw, I publish here all the steps i followed in order to get MacOSX working on my Windows XP system.
First go to the download page and get the win32-sdl-jitc file.
Extract it to your “/PPC” folder.
Be sure your PPC folder contains also these sub directories:
-PPC
-PPC/imgs
-PPC/dev
-PPC/dev/cdrom
You will use later.
Now you need an hdd image file, download it from here and extract the file into your /PPC/imgs directory. Rename the extracted file into “hdd.img” (it’s a 6Gb image file)
Now you need a MAC OSX installation disc. (you can buy it form ebay).
Since PPC does not support cdrom you need to convert cdrom into .iso files ( with Nero or others cd burning utilites ).
Copy all the .iso files into your /PPC/dev/cdrom directory.
Ok, now you need to create your configuration file in order to start. This is my configuration file “alex.config”
#PearPC Configuration File
ppc_start_resolution = “1280x1024x15”
redraw_interval_msec=30
prom_driver_graphic = “video.x”
key_toggle_mouse_grab = “F12”
key_toggle_full_screen = “Alt+Return”
cpu_pvr=0x00088302
# I gave to mac up to 560Mb of RAM
# comment the line below to assign the default 128Mb of RAM
memory_size=0x20800000
prom_bootmethod=”select”
prom_env_machargs=”-v”
# HDD
pci_ide0_master_installed=1
pci_ide0_master_image=”imgs/hdd.img”
pci_ide0_master_type=”hd”
# CD-ROM
pci_ide0_slave_installed=1
pci_ide0_slave_image=”dev/cdrom/Mac Os X 10.3 Panther Cd1.iso”
pci_ide0_slave_type=”cdrom”
# Network
pci_rtl8139_installed=0
pci_rtl8139_mac=”de:ad:ca:fe:12:34″
pci_usb_installed=1
nvram_file=”nvram”
Now, from the command shell just type: ppc.exe alex.config..
Boot from the cd, form the list you will see and let’s wait until mac installation starts. at this point be sure you have a lot of coffe near you, you have to wait a long time… long time (depends on your computer)
P.S. Once you got a working OSX installation you can take a look at this link:
http://www.pearpc.net/guides.php?guides_id=6
Here you can learn how to mount your .img hdd on Windows in order to transfer files between Windows and MAC.